SILVERSMITHING GUIDE

How To Anneal Silver Properly

Annealing restores softness to silver after rolling, hammering, bending or forming. Proper annealing helps prevent cracking, reduces internal stress and creates more predictable behavior during jewelry fabrication.

Jewelry torch flame heating silver during soldering or heat-control work
Work Hardening

What Does Annealing Do?

Silver becomes harder as it is worked through bending, hammering, rolling, drawing, forming and shaping. This is called work hardening.

Annealing softens the metal again by relieving internal stress inside the alloy. Proper annealing makes silver easier to bend, form and shape without cracking.

Restores flexibility Worked silver becomes easier to bend, shape and form again.
Reduces cracking risk Annealing before the metal fights back helps prevent stress cracks.
Improves forming behavior Softened silver moves more predictably under tools and pressure.
Reduces internal stress The metal becomes less springy and more cooperative for the next step.
Hands bending or shaping a ring component during jewelry fabrication
Silver becomes harder as it is formed. Annealing restores softness before the metal cracks, resists shaping or becomes difficult to control.
Metal Behavior

Why Silver Hardens During Work

Every forming operation changes the internal structure of the metal. As silver is compressed, bent or stretched, it gradually becomes harder and less willing to move.

This is useful when you want a finished piece to hold shape, but it becomes a problem when you still need to keep forming the metal.

Rolling mill reduction Compressing silver sheet or wire makes it harder as the metal thins or stretches.
Hammer forming Repeated blows harden the metal while changing its shape.
Ring bending Curving a blank around a mandrel or tool can quickly stiffen the silver.
Wire drawing or stretching Pulling or stretching silver makes it less willing to move further.
Ring bending tool used to form silver ring blanks before soldering
Ring bending and repeated forming harden silver. Annealing before the metal becomes stubborn gives cleaner results.
Timing

When Should You Anneal Silver?

You do not need to anneal after every tiny adjustment, but you should anneal when the metal becomes noticeably harder, springier or less cooperative.

Annealing is especially important before major bending, deep forming, repeated hammering or continued rolling reduction.

Anneal early Before the metal starts fighting you.
Avoid forcing Do not push stiff silver through one more hard bend.
Watch springiness Springy behavior often means the metal is work-hardened.
Check cracking signs Cracks mean the metal has already gone too far.
Annealing Method

How Jewelers Anneal Silver

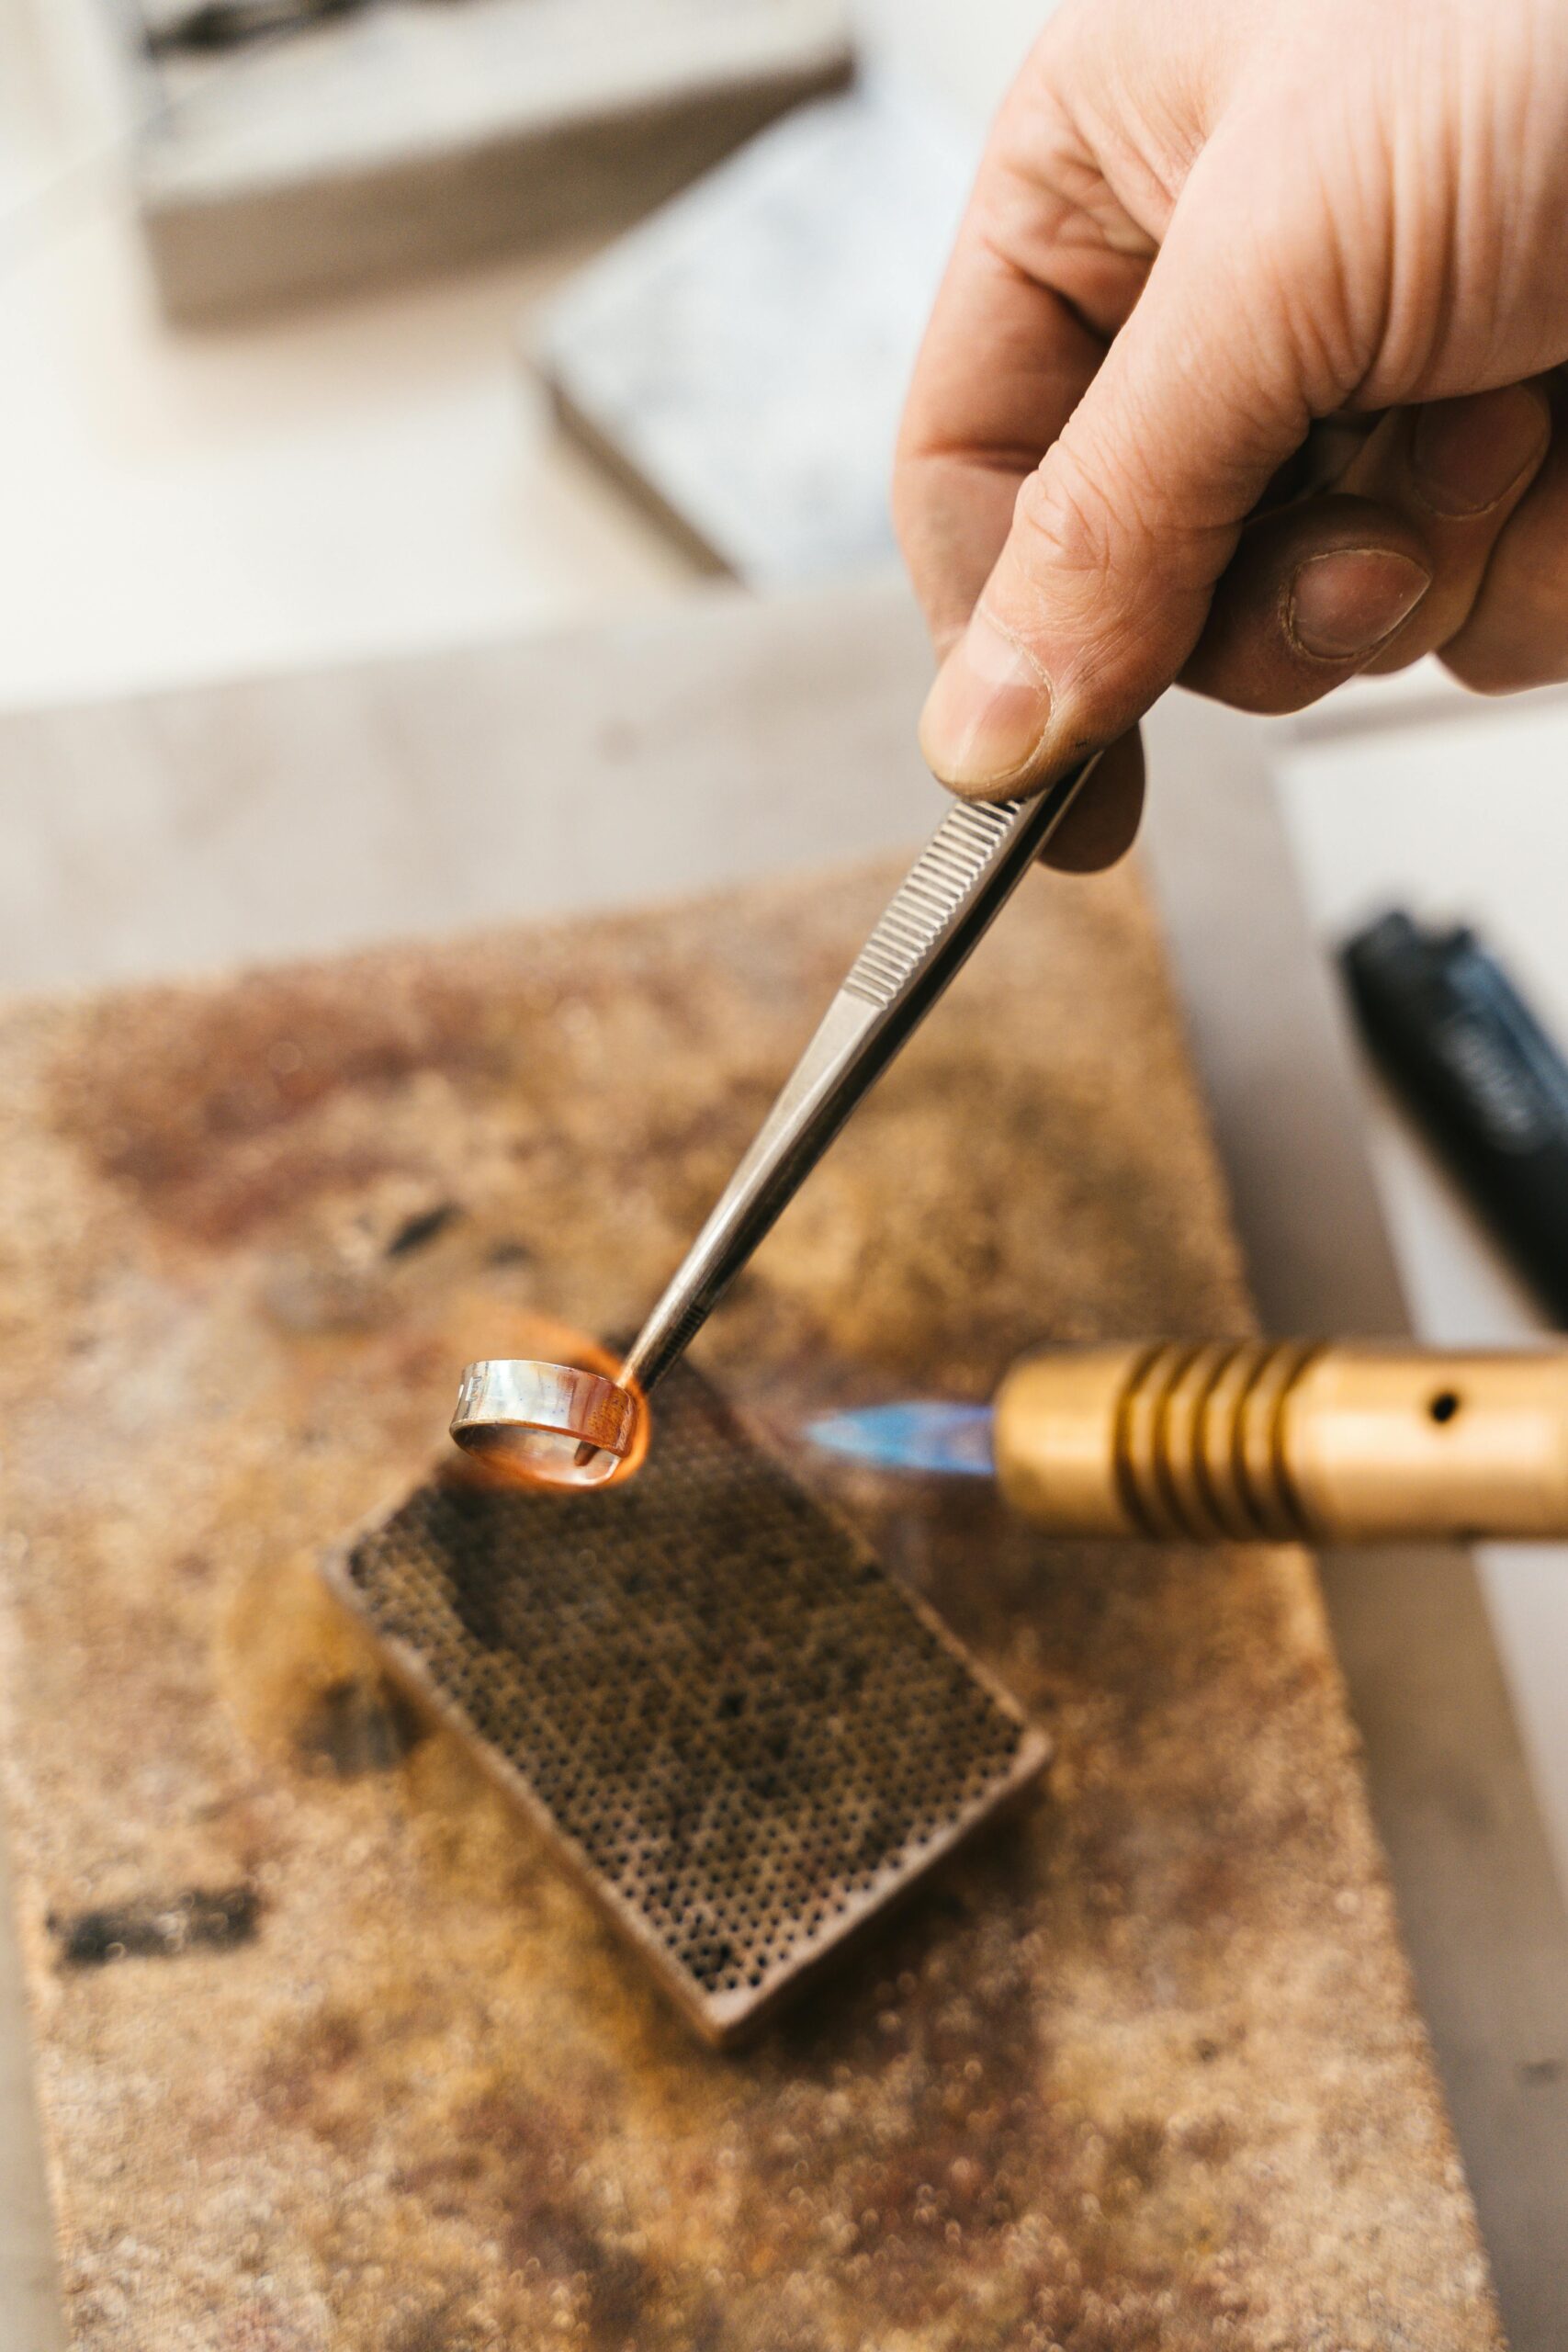
Annealing usually involves heating silver evenly until the metal reaches the correct annealing range, then allowing it to cool safely before further fabrication.

The goal is controlled, even heat. Annealing is not the same as blasting the metal with the torch until it glows dramatically.

Move the flame continuously Even torch movement helps avoid hot spots and partial annealing.
Heat the whole area gradually The metal should soften evenly, not only in one small spot.
Watch surface behavior Subtle surface and color changes tell you more than time alone.
Cool and inspect Do not keep forming until you have checked the surface and shape.
Heat Risk

Overheating Creates Problems

More heat is not better. Excessive heat exposure can damage the surface, increase oxidation and make the metal harder to finish cleanly afterward.

Thin silver can overheat quickly, especially when the torch is held too close or too still.

Fire scale and heavy oxidation Too much heat creates more cleanup and surface correction work.
Surface pitting or rough texture Overheated silver can become harder to finish cleanly.
Warping and uneven shape Localized heat can distort thin or unsupported areas.
Melted thin edges Edges and narrow sections can overheat before the rest of the piece looks ready.
Jeweler applying torch heat to a soldering block at the bench
Annealing should use controlled, even heat. A dramatic glow is not the goal for ordinary jewelry annealing.
Thin Vs Heavy Stock

Thin Silver Heats Faster

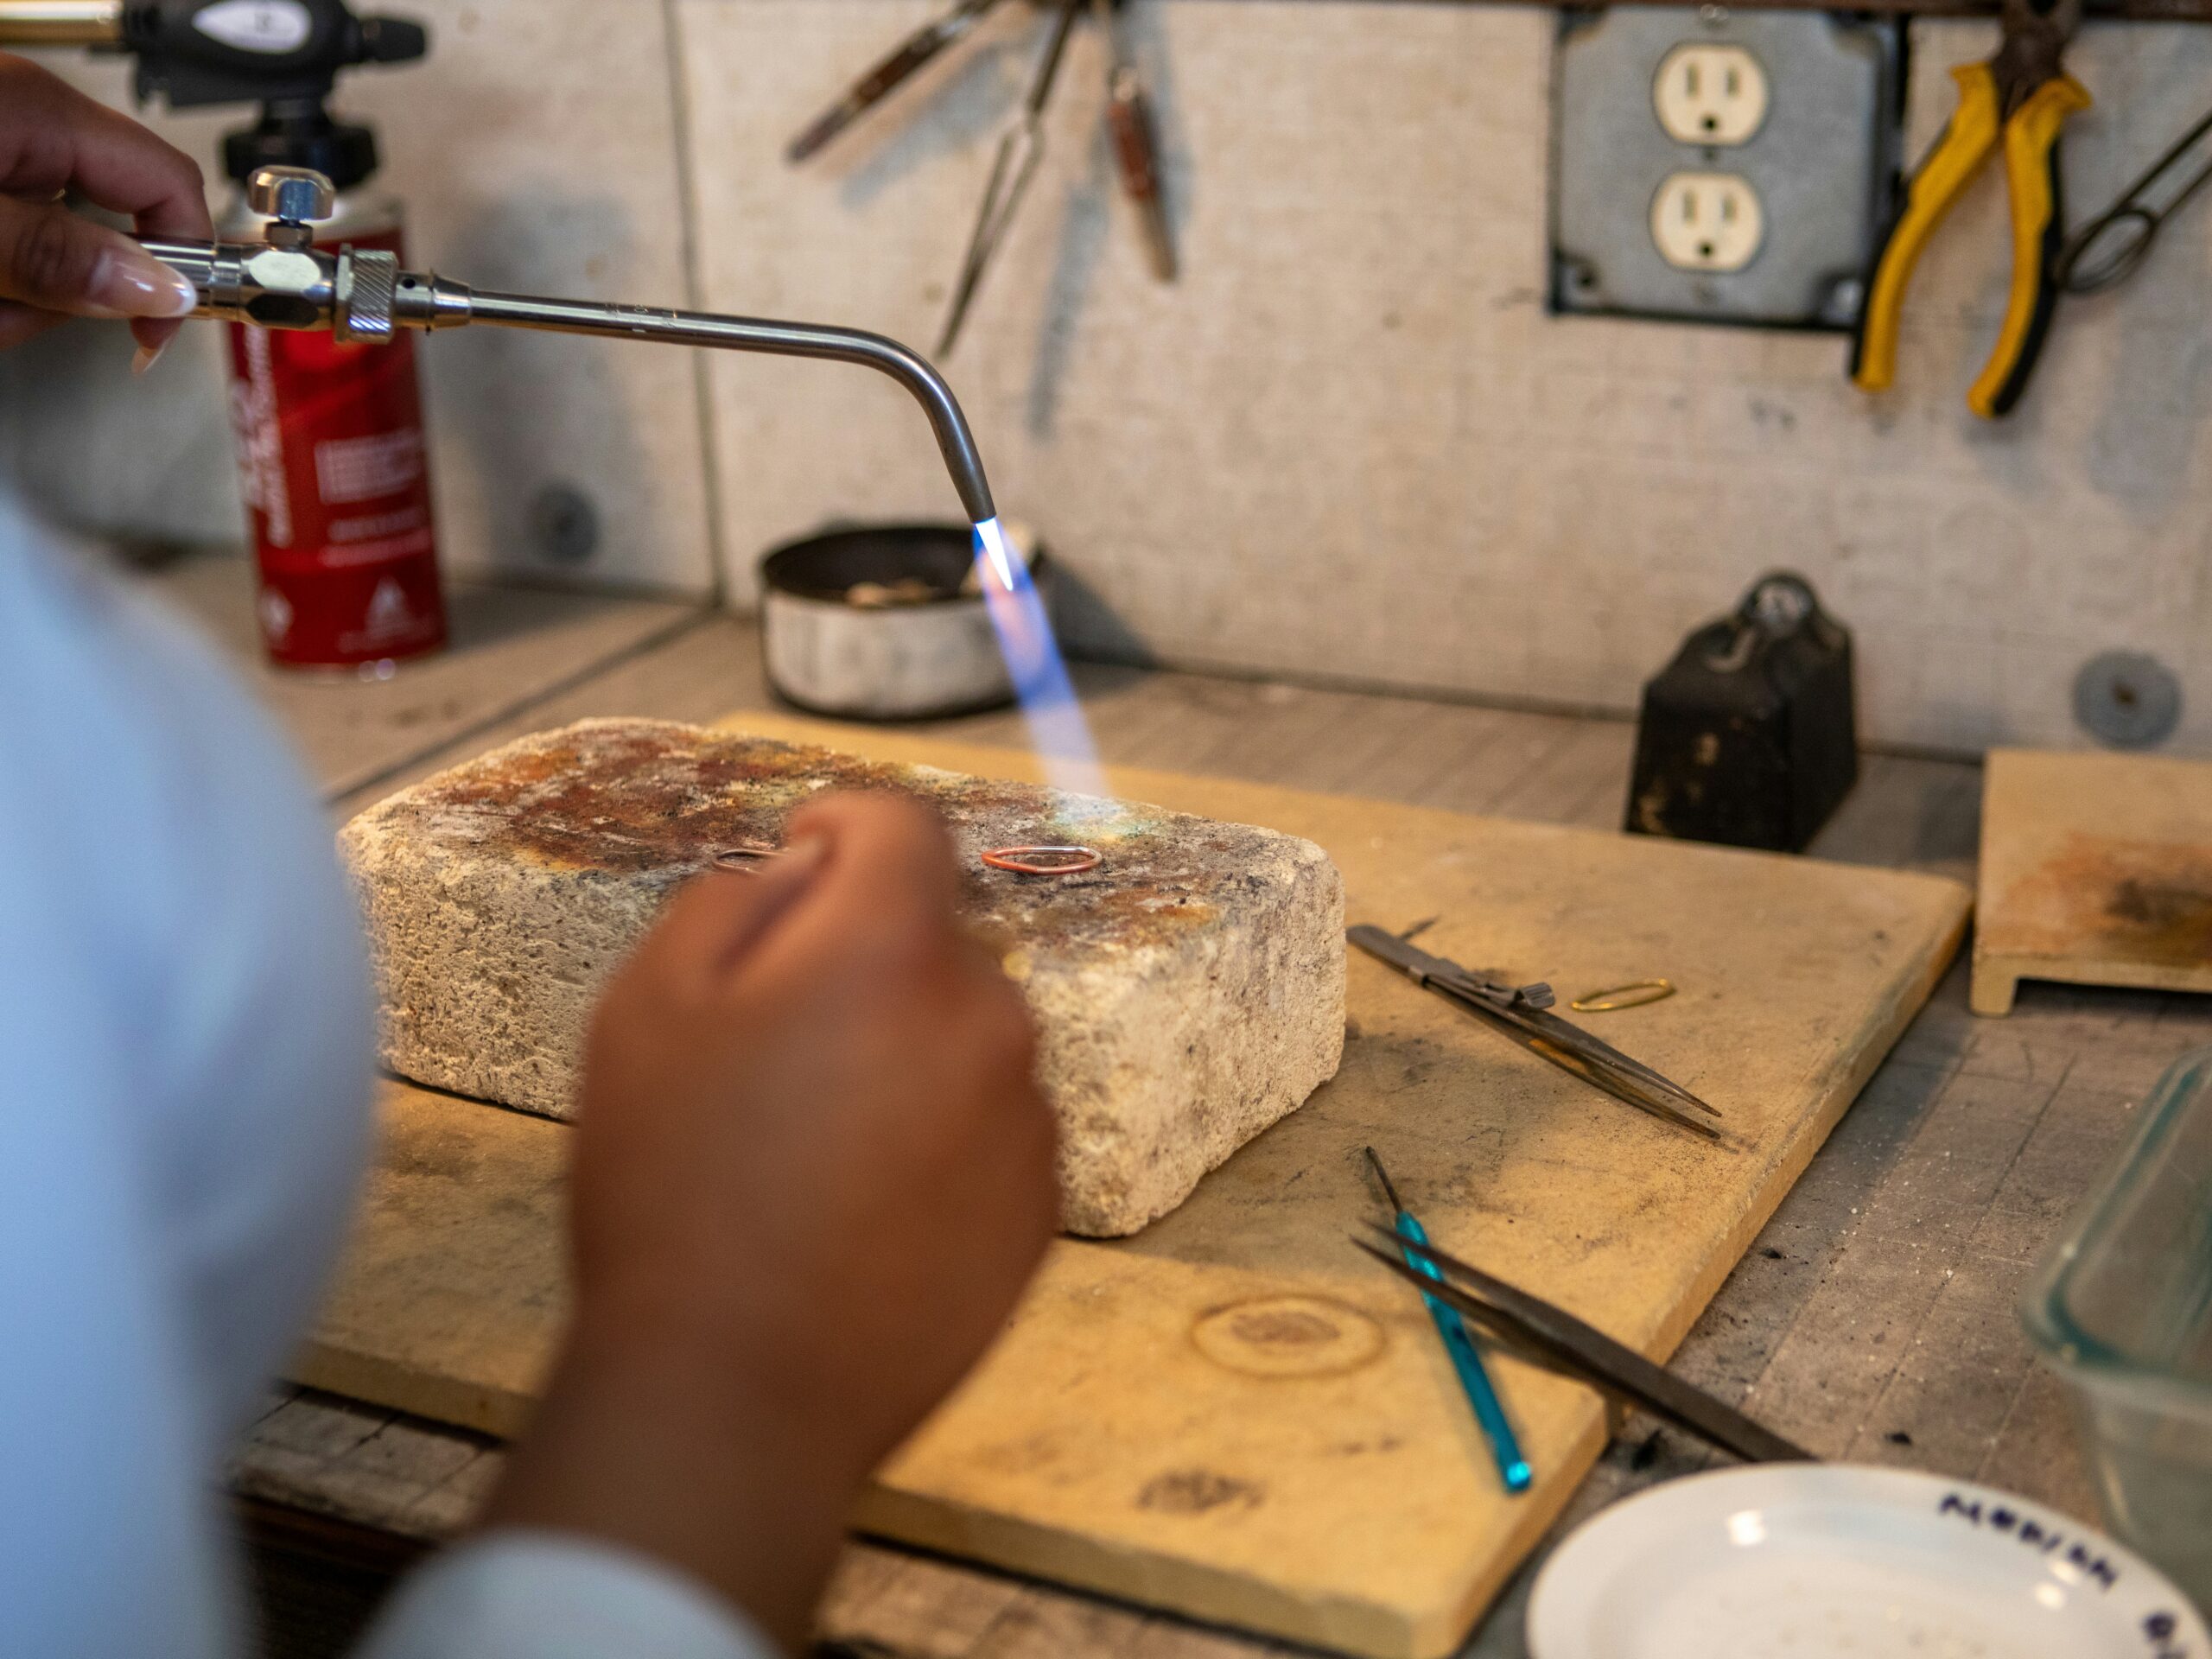
Thin silver sheet, fine wire and bezel material reach annealing temperature much faster than heavy stock. The same torch setting that feels reasonable on a thick ring shank may be too aggressive for delicate parts.

Adjust flame size, distance and movement based on the thinnest part of the piece.

Thin bezel wire Can overheat before the rest of the piece looks hot.
Fine wire Needs softer torch movement and careful observation.
Heavy ring stock Usually needs broader, more gradual heat.
Mixed thickness Heat the heavier area gradually while protecting thin sections.
Torch flame heating a glowing silver piece on a soldering surface
Bright orange glow usually means the silver is becoming dangerously overheated for ordinary jewelry annealing.
Visual Control

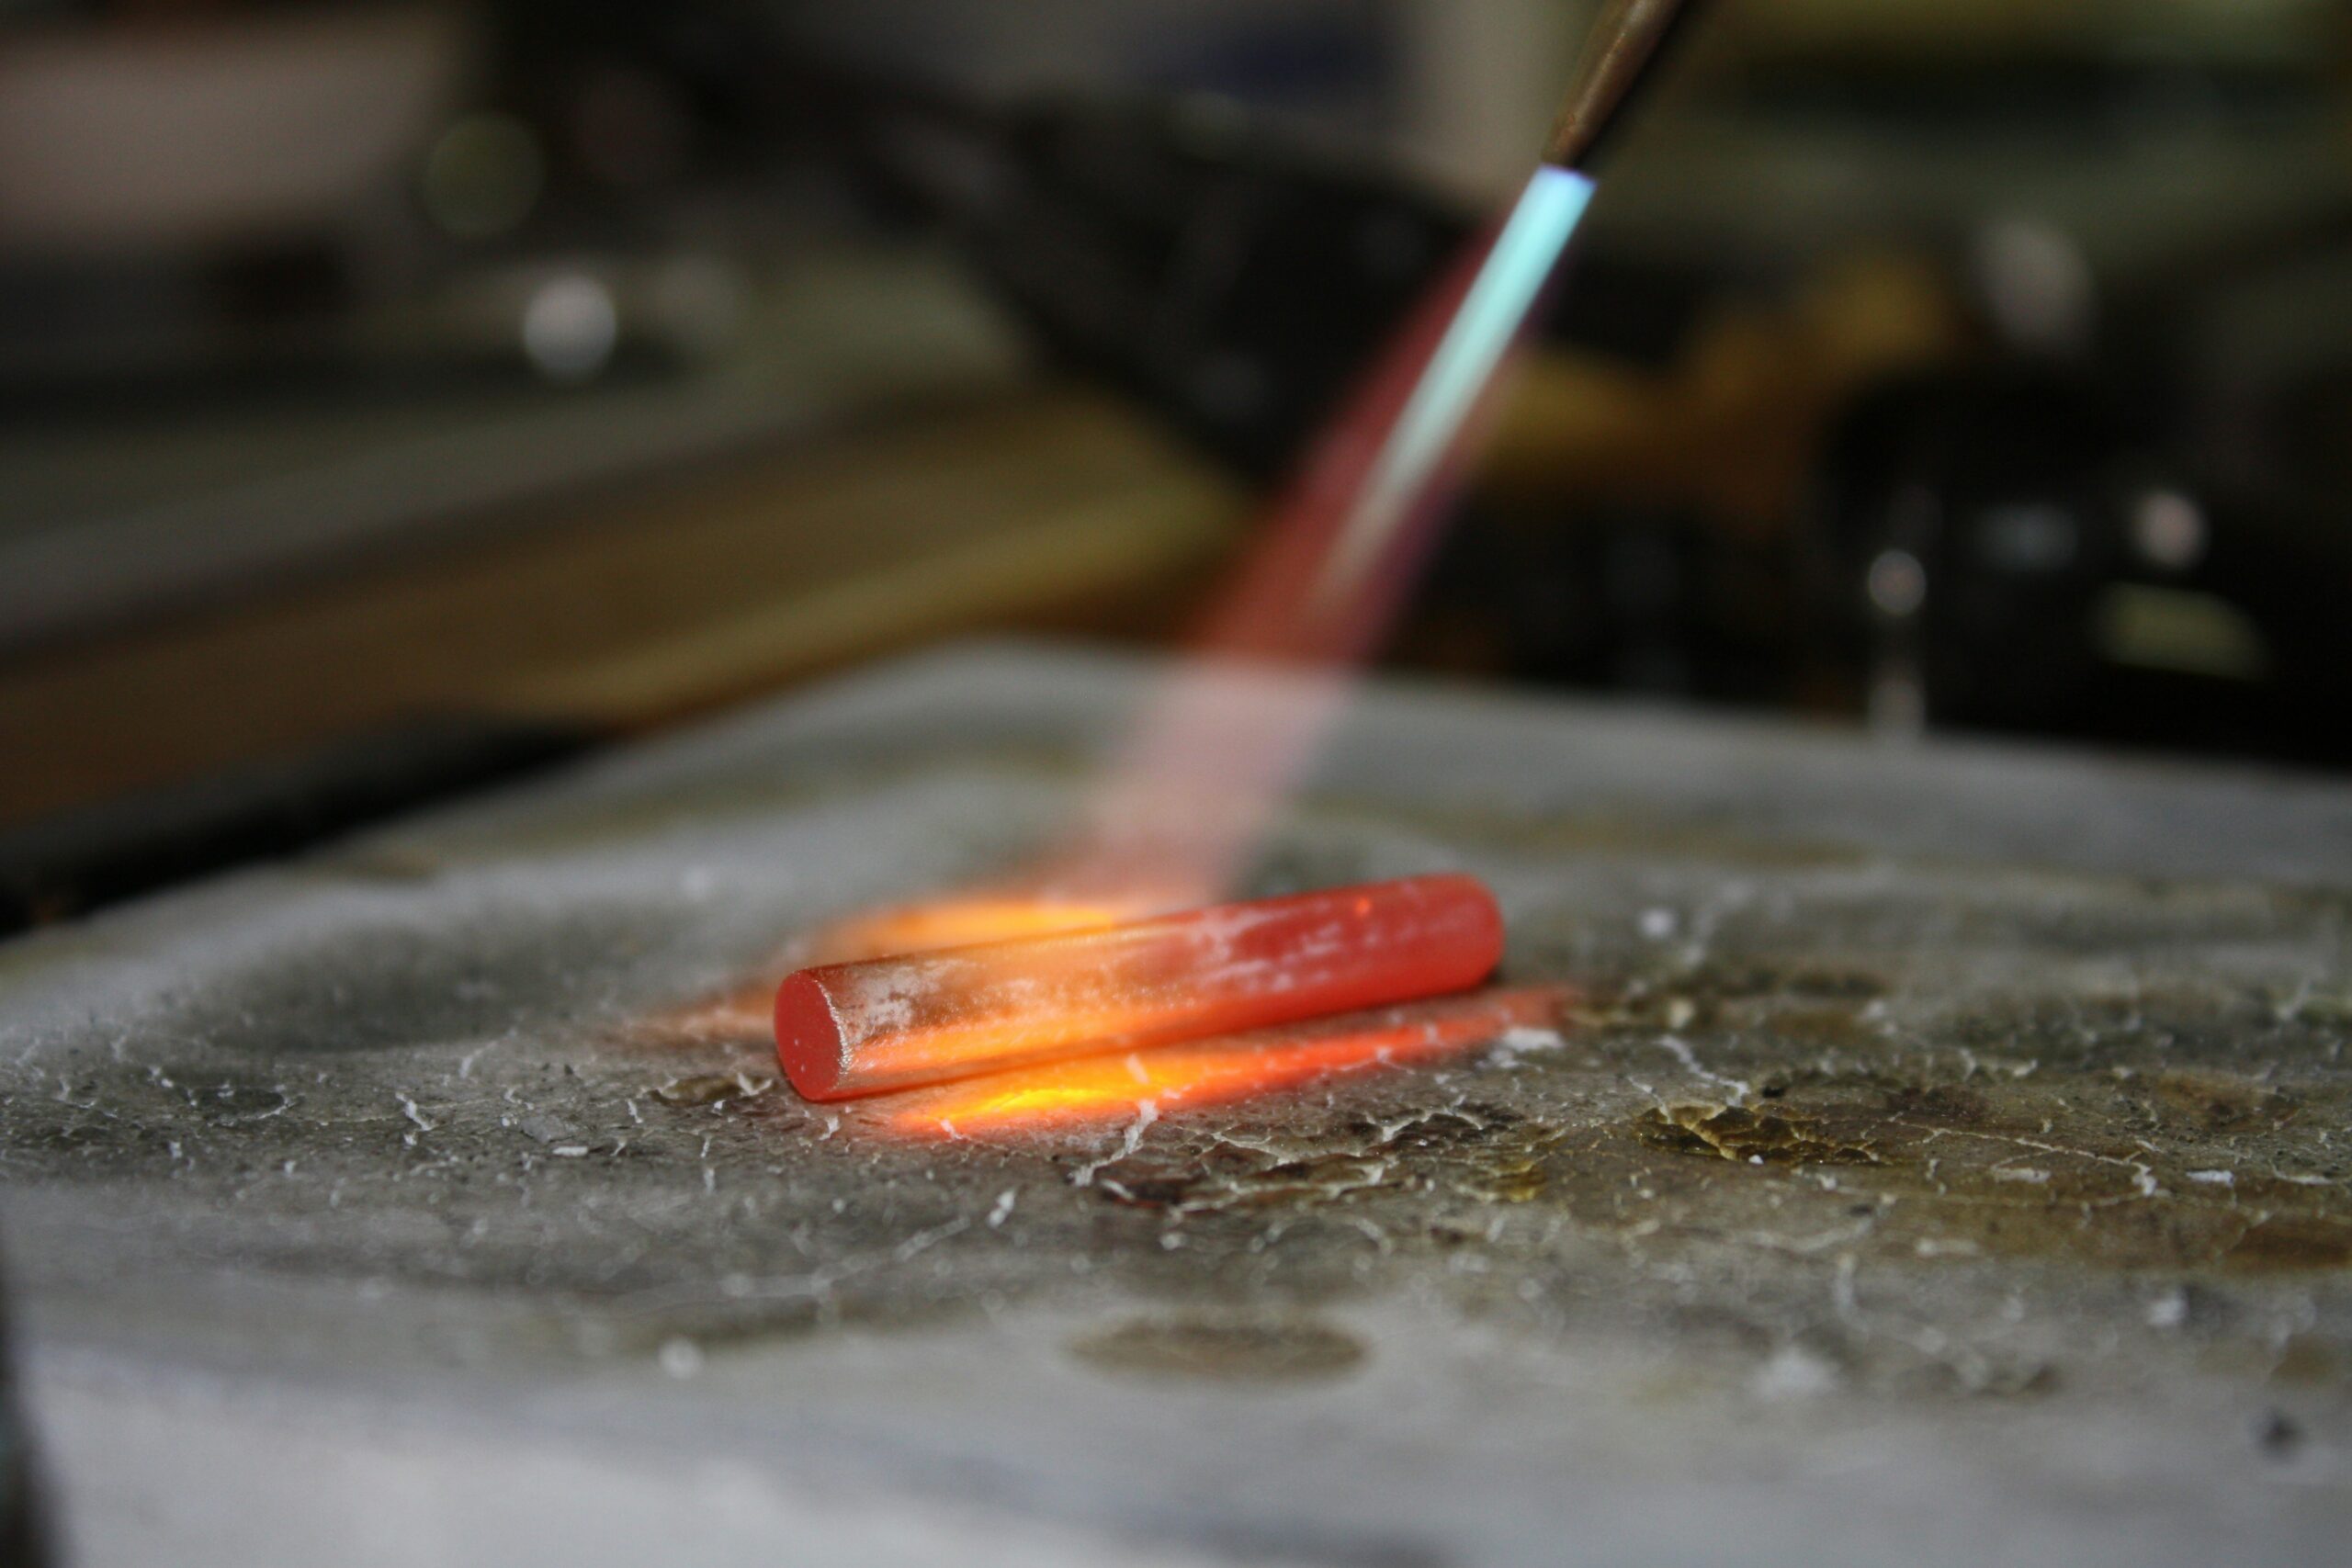
Watch Surface Color Carefully

Jewelers often monitor subtle color and surface changes rather than relying only on time. Annealing temperature depends on the metal, thickness, lighting and torch setup.

Good observation helps you stop before the metal overheats.

Subtle dull glow In suitable lighting, the surface may show a controlled, quiet change.
Even temperature The area should heat evenly rather than racing in one local spot.
Consistent surface behavior Watch the metal, not only the clock.
No edge slump Localized melting or movement means the heat has gone too far.
After Heating

Cooling And Pickling

After annealing, silver is usually cooled and cleaned before further fabrication. Pickling removes oxidation and surface residue so you can inspect the metal properly.

Do not judge the surface finish too early. Oxidation and discoloration often hide what the surface really looks like until after proper cleaning.

Let the piece cool safely Avoid sudden movement or contamination while the metal is still hot.
Clean oxidation Pickling helps remove surface oxidation after heating.
Rinse and dry Clean handling makes inspection more reliable.
Inspect before forming again Check for cracks, warping, pitting or uneven surface condition.
Diagnosis

Quick Annealing Diagnosis

Annealing problems usually show up during the next forming step. If the silver still feels stiff, cracks, warps or shows heavy oxidation, the heat cycle needs to be reviewed.

Cracking The metal may still be too work-hardened for further forming.
Heavy oxidation Overheating or long heating time can increase oxidation and fire scale.
Warping Localized heat can distort thin or unsupported silver.
Mixed softness Part of the piece may have annealed while another area stayed hard.
Pickle solution setup for cleaning silver jewelry after soldering or annealing
Cleaning after annealing helps reveal cracks, surface pitting, overheating marks and uneven metal behavior.
Professional Workflow

How Professionals Anneal Silver

Professional jewelers usually prioritize controlled heat movement and careful surface observation instead of aggressive flame intensity.

The goal is to soften the silver enough for the next fabrication step while keeping the surface clean, controlled and easy to finish.

Work the silver Bend, roll, hammer or form until resistance increases.
Stop before cracking Do not force stiff, springy metal to keep moving.
Heat evenly Move the flame continuously across the area.
Watch the surface Look for controlled color and behavior.
Clean and inspect Pickle, rinse, dry and check the metal before forming again.

Anneal Before The Silver Starts Fighting You

Proper annealing makes silver easier to form, reduces cracking risk and improves control throughout the jewelry making process. Controlled heat, careful observation and clean post-heating inspection usually create the safest results.